In Part 1 of this tutorial, you learned the concepts of creating an iOS document-based app. In Part 2 of the tutorial, you will put those concepts into practice by building a simple rich text editor. You must be running Xcode 9 or later to follow along, as Apple added the document-based app project template in Xcode 9.
If you haven’t read Part 1 of the tutorial, you should do so before you read this tutorial. The first part explains some higher-level concepts that this part glosses over.
Create The Project
Let’s start by creating the project. Open Xcode and choose File > New > Project. The New Project Assistant opens.
Click the iOS button at the top of the window. Select Document Based App. Click the Next button to move to the next step.
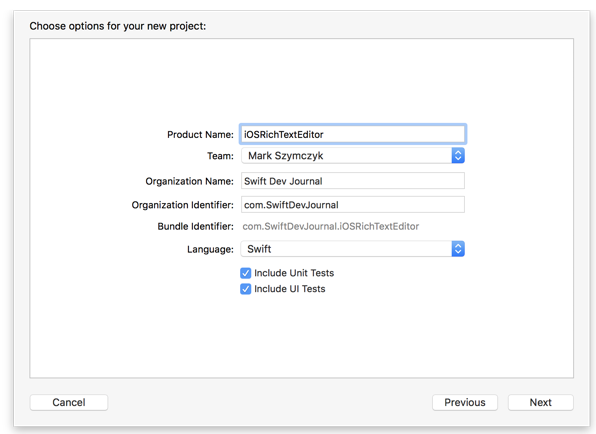
Name the project in the Product Name text field. Choose your iOS developer profile from the Team menu. Enter your company name or your name in the Organization Name text field. Use that name to fill in the organization identifier. The organization identifier usually takes the form com.CompanyName. This site is called Swift Dev Journal so choose Swift from the Language menu. Click the Next button to choose a location to save the project.
If you look at the project navigator on the left side of the project window, you should see Swift files for the document browser view controller, the document view controller, and the document. You should also see a storyboard. Those are the files you are going to use in the project.
Build the User Interface
Now that you created the project, the next step is to build the user interface, which mostly consists of a text view. Select the Main.storyboard file from the project navigator to open it. The storyboard has two scenes: one for the document browser view controller and one for the document view controller. You’re going to lay out the user interface in the document view controller. Apple creates the document browser user interface for you.
You’re going to perform the following tasks to build the user interface:
- Remove most of the user interface in the document view controller.
- Add a text view to the document view controller scene.
- Configure the text view so you’re editing rich text instead of plain text.
- Add constraints to the Done button so it’s centered on all iOS devices.
- Add constraints to the text view so the text isn’t on the edges of the screen.
- Create an outlet for the text view and connect the outlet so you can access the text view in your code.
Remove Most of the Existing User Interface
The document view controller looks like the following initially:

Keep the Done button so people can go back to the document browser when they’re finished editing a document. Move the Done button out of the stack view and place it at the top center of the screen. After moving the Done button out of the stack view, delete the stack view.
Add a Text View
To add a text view, select the text view element from the object library and drag it to the document view controller. If you can’t find the object library, remember that Apple moved the object library in Xcode 10. The button to open the object library is on the right side of the toolbar.
![]()
Place the text view below the Done button and have it fill the rest of the view. The document view controller scene should look similar to the following screenshot:

Configure the Text View
Select the text view and open the attributes inspector. Choose Attributed from the Text menu so the text view shows rich text instead of plain text. You can also remove the Lorem ipsum text if you want. Select the Allows Editing Attributes checkbox.
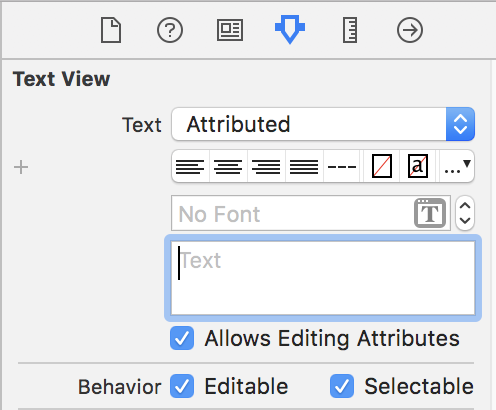
Make sure the Editable checkbox is also selected. A text editor that doesn’t let you edit text is not much fun to use.
Add Constraints for the Done Button
Add a constraint to center the Done button horizontally at the top of the view so that it’s centered on all iOS devices. Select the Done button. Click the Add Constraints button to open a popover to add an alignment constraint.

Select the Horizontally in Container checkbox. Click the Add 1 Constraint button at the bottom of the popover to add the constraint.
Add Constraints for the Text View
The container for the text view fills the entire view by default. This means the text you type is pushed against the left edge of the text view. Add some constraints to add some padding.
Select the text view. Click the Add Constraints button to open a popover to add new constraints.

Click the four struts surrounding the square at the top of the popover to add some spacing for the text view. Enter spacing values in the text fields. I added 16 points of spacing to the left and right edges and added 10 points of spacing for the top and bottom edges. Click the Add 4 Constraints button at the bottom of the popover to finish adding the constraints.
Create and Connect the Text View Outlet
To be able to access the text view in your code, you must add an outlet for the text view in your code and connect the text view in the storyboard to the outlet. Add the following property to the DocumentViewController class to create an outlet:
|
1 2 |
@IBOutlet weak var textView: UITextView! |
Now connect the text view in the storyboard to this outlet. Open the assistant editor (choose View > Assistant Editor > Show Assistant Editor) so the source code file and storyboard are both open. Select the text view in the storyboard, hold down the Control key, and drag it to the outlet to make the connection.
Creating the Document
If you run the project at this point, you’ll notice that tapping the Create Document button does nothing. To create a new document when someone taps the Create Document button, you must do the following:
- Add an empty document file to your project with the same file extension as your document.
- Edit the document type in Xcode.
- Add code to load the empty document in the document browser view controller.
If you were creating a new document type, you would also have to add an exported UTI for the document. But this app saves RTF files so you don’t need to add an exported UTI.
Add an Empty Document File
Fortunately Xcode has a RTF file template to use as the empty document file. To add an empty RTF file to the project, choose File > New > File. The Rich Text File is in the Resource section under iOS.

Name the file. I named the file New Document. You can choose a different name if you want, but remember the name.
Edit the Document Type
Select the project from the project navigator to open the project editor. Select the app target from the left side of the project editor. Click the Info button at the top of the project editor to access the document types. Click the disclosure triangle next to Document Types.

- Enter
RTFin the Name text field. - Enter
public.rtfin the Types text field.public.rtfis the standard UTI (Uniform Type Identifier) for RTF files. - Set the
CFBundleTypeRolekey’s value toEditorso people will be able to edit RTF files in the text editor. - Set the
LSHandlerRankkey’s value toAlternate. This will let people edit RTF files in the app without forcing them to use the app to edit all RTF files.
Load the Empty Document
Open the DocumentBrowserViewController.swift file and go to the didRequestDocumentCreationWithHandler function. You should see the following line of code at the start of the function:
|
1 2 |
let newDocumentURL: URL? = nil |
Change this line of code so it retrieves the empty document file you added to the project.
|
1 2 3 |
let newDocumentURL = Bundle.main.url(forResource: "New Document", withExtension: "rtf") |
Make sure the name of the resource matches the name of the empty document file you added to the project. If the names don’t match, the new document won’t be created.
There’s one more change to make to the code.
|
1 2 3 4 5 6 |
if newDocumentURL != nil { importHandler(newDocumentURL, .move) } else { importHandler(nil, .none) } |
There’s a problem with the code inside the if block.
|
1 2 |
importHandler(newDocumentURL, .move) |
If you keep this code, your app will crash the second time you create a document because the empty document file was moved out of the app bundle when you created the first document. When you try to load the empty document file the second time, the app can’t find it in the app bundle, causing a crash. You must copy the file from the app bundle to create multiple documents without crashing.
|
1 2 |
importHandler(newDocumentURL, .copy) |
Update Document When Text View Changes
The user interface consisting mainly of a text view has a potential problem. If you wait for the person using the app to stop editing to update the document contents and save, you won’t be updating and saving until the person taps the Done button. You run the risk of losing data.
For this project you’re going to update the document’s data to match the text view contents when the text view’s contents change. This behavior is not the most efficient, but it minimizes the risk of losing data.
Start by adding the following property to the Document class that stores the document’s text:
|
1 2 |
var text: NSAttributedString? = nil |
Now it’s time to write some code to update the document when the text view’s contents change. Add the following function to the document view controller:
|
1 2 3 4 5 |
func textViewDidChange(_ textView: UITextView) { document?.text = textView.attributedText document?.updateChangeCount(.done) } |
When the contents of the text view change, change the document’s text property so it holds the text view’s contents. Update the change count for the document to trigger autosaving for the document.
Save the Document
To save the document, implement the function contentsForType in the Document class.
|
1 2 3 4 5 |
override func contents(forType typeName: String) throws -> Any { guard let textToSave = text else { return Data() } return NSKeyedArchiver.archivedData(withRootObject: textToSave) } |
The first line of code makes sure the text property is not nil before saving. The second line grabs the document’s text and calls the NSKeyedArchiver method archivedData to save the text.
Open the Document
To open the document, start by implementing the load function in the Document class.
|
1 2 3 4 5 6 7 8 9 10 |
override func load(fromContents contents: Any, ofType typeName: String?) throws { // Load your document from contents guard let data = contents as? Data else { return } guard let fileContents = NSKeyedUnarchiver.unarchiveObject( with: data) as? NSAttributedString else { return } text = fileContents } |
The first line of code in the function makes sure the file has suitable data to load. The second line loads the document text from the file by calling the NSKeyedUnarchiver method unarchiveObject. The last line sets the document’s text property to the text you loaded from the file.
Now you must set the text view’s contents to the document’s text you just loaded. The document view controller’s viewDidAppear method has a block of code to open the file. If the open is successful, set the text view’s attributed text to the document’s text.
|
1 2 3 4 5 6 7 8 9 |
document?.open(completionHandler: { (success) in if success { // Display the content of the document. self.textView.attributedText = self.document?.text } else { // Make sure to handle the failed import appropriately. } }) |
Conclusion
I put this project on GitHub for you to look at if you run into problems. If you look at the GitHub project, you can see how to scroll the text view when the onscreen keyboard appears and disappears. Scrolling the text view is important for a text editor so the keyboard doesn’t block what you’re typing, but scrolling the text view doesn’t involve document-based apps so I didn’t write about it in the article.